


The OXVA Xlim V3 replacement pods are a game-changer for new vapers.
Known for their sleek design, top-fill system, and integrated mesh coils, these pods combine convenience, durability, and versatility and are compatible with the OXVA Xlim Pod Kit, among other devices.
As such, they're a popular choice for mouth-to-lung (MTL) and restricted direct-to-lung (RDTL) enthusiasts alike.
In this article, we'll explain everything you need to know about the OXVA Xlim V3 replacement pod.
From their features and lifespan to tips on maintenance and refilling, this guide has you covered.
In this article
A quick lowdown on the OXVA Xlim V3 replacement pods
How long do the OXVA Xlim V3 replacement pods last?
How can I make my OXVA Xlim V3 replacement pods last longer?
How do I know when it’s time to replace my OXVA Xlim V3 replacement pods?
How do I fill my OXVA Xlim V3 replacement pods?
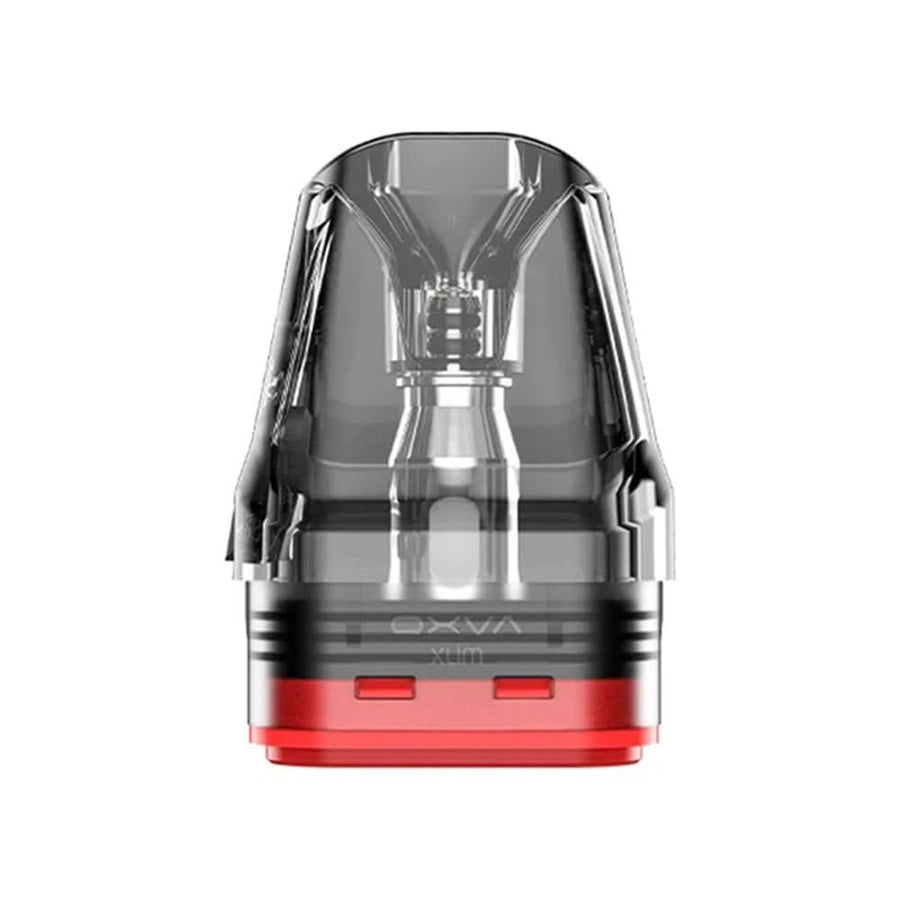
A quick lowdown on the OXVA Xlim V3 replacement pods
The OXVA Xlim V3 replacement pods are an upgrade on the original XLIM pods and are compatible with an array of OXVA kits (as we’ll cover below).
These pods have a 2 ml e liquid capacity and are ideal for both mouth-to-lung (MTL) and restricted direct-to-lung (RDTL) vaping styles, as they contain integrated mesh coils in various resistance levels. Therefore, they cater to a diverse range of user preferences.
Having integrated coils means you can refill the pods several times and discard them when the coils reach the end of their cycle (i.e., once the taste of your vape has deteriorated).
The OXVA Xlim V3 replacement pods have a sleek design, robust construction, and easy top-filling system, which minimises mess. (Again, we’ll explain how to fill your pods further down.)
One really neat feature of these pods is their magnetic connection. This connection guarantees a secure fit to the device, giving you extra portability and ease of use.
It also makes replacing your coils straightforward, and you don’t have to disconnect them from your device when you want to top them up with your favourite e liquid.
How long do the OXVA Xlim V3 replacement pods last?
You should get around one to two weeks of usage out of a single OXVA Xlim V3 replacement pod.
How can I make my OXVA Xlim V3 replacement pods last longer?
The below factors impact how long your OXVA Xlim V3 replacement pods will last.
Your choice of e liquid
If you use vape juice that isn't too sweet, i.e., not too high in artificial sweeteners like sucralose, this will prolong the life of your pods. Liquids containing a high amount of sweetener content can cause residue to build up on the coil, which reduces its efficiency and lifespan. As such, flavours that are “sugar-free” or “low-sweetener” are better for pod systems.
Your usage
This is an obvious point, but you may not realise just how much the frequency and nature of your usage can affect the lifespan of your pods.
For example, if you’re a chain vaper, you’re not allowing the coil to cool down or the wick to re-saturate. This can lead to 'dry hits', causing the wick to burn and reducing the flavour quality.
Taking long, extended puffs will also decrease lifespan. Doing this increases the amount of heat applied to the coil, and over time, this can cause faster coil degradation, leading to a shorter pod life.
Your level of care
We’ll cover this point in more depth below, but essentially, you’ll get more mileage from your pods by following proper cleaning practices and refilling techniques.
Not overfilling your pod, ensuring the e liquid is above the minimum fill line, and periodically inspecting the pod for signs of wear and tear are among the basic steps you can take to keep your pods functioning optimally for longer.
How do I know when it’s time to replace my OXVA Xlim V3 replacement pods?
You should replace your OXVA Xlim V3 replacement pod when it:
- Is cracked
- Can no longer hold the coil in place
- Gives off a burnt or harsh taste (as this means the wick inside the coil isn’t absorbing e liquid anymore)
- Doesn’t produce as much flavour
- Doesn’t produce as much vapour as usual
- Starts to leak frequently
- Spits little drops of e liquid into your mouth when you’re vaping
These are all telltale signs that your OXVA Xlim V3 replacement pod isn’t working as it should do and that it’s time to purchase a new pod for a better vaping experience.
How do I fill my OXVA Xlim V3 replacement pods?
Refilling your pods is easy. If you follow these seven simple steps, you won’t go wrong:
- Detach the pod from your OXVA Xlim kit by gently pulling it out.
- Open the silicone plug located on the side of the pod to access the filling port.
- Hold your pod at a 90-degree angle.
- Insert the nozzle of your e liquid bottle into the filling port, making sure the nozzle doesn’t touch the coil or metal inside.
- Slowly squeeze the bottle to fill the pod. Be careful not to overfill the pod, as this could cause leakage. Keep it at a 90-degree angle, as we wrote above.
- Close the plug quickly and wipe up any excess liquid that gets pushed out when closing.
- Reattach the pod cap to your kit and gently press it down until it fits snugly, ensuring it clicks into place.
Once you’ve completed the final step, you should wait a few minutes before vaping to allow the wick (the white, fluffy material that you can see through the openings on the side and top of a vape coil) to fully absorb your e liquid. Doing this will prevent dry hits.
How do I clean my OXVA Xlim V3 replacement pods?
Although you most likely won’t use your OXVA Xlim V3 replacement pod for more than two weeks at a time, it’s worth keeping it as clean as possible for optimal performance.
If you follow the below steps, you won’t go far wrong.
Remove the pod
First, detach the pod from your device, making sure your device is switched off.
Empty the e liquid
If there’s juice left in the pod, carefully pour it onto a paper towel or into a disposable container. To get rid of any excess liquid, tip the pod upside down and gently tap it.
Rinse the pod with warm water
Doing this will get rid of any dirt or remaining e liquid.
Make sure you rinse the empty pod section without the coil. Do not soak or submerge the coil in water, as this can cause permanent damage. Most pods with built-in coils should not be fully rinsed.
Pat the pod dry
You can use a clean cloth or kitchen roll to do this. Avoid using any abrasive materials or harsh chemicals, and make sure there’s no excess moisture left, especially in or around the coil area.
Air dry thoroughly
Allow the pod to air dry for several hours. You could always use a hairdryer on a low heat setting to speed up the process.
Whatever you do, you need to make sure your pod is completely dry before refilling so that you get the best flavour and vapour production.
Grab your OXVA Xlim V3 replacement pods right here
There’s a reason these pods have a five-star rating on our website, as you can gather from our write-up.
Click on the button below to get your hands on them and see what all the excitement is about.