


How to Clean a Coil
Would you be surprised to hear that you don’t need to vape your way through an entire box of coils every week?
Several factors can limit coil life. The most significant of these are vaping sweetened e-liquids and the huge volume of e-liquid consumed by low resistance (sub ohm) vape coils.
Coils are more costly than ever, and many vapers feel that their coils don’t last as long as they should.
But it is possible to prolong the lives of coils by cleaning them.
Finding the Sweet Spot

The Trouble With Sweetened E-Liquids
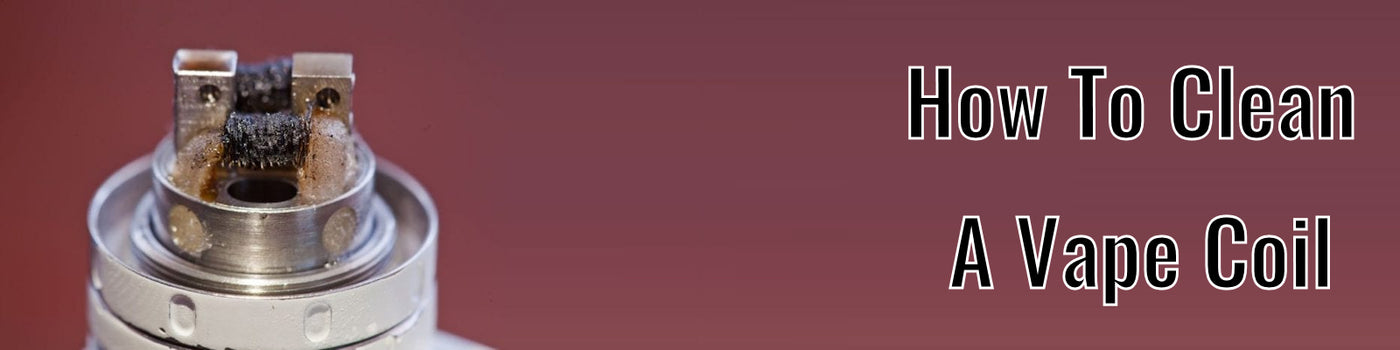
Many e-liquid flavours are sweetened by sucralose, an artificial sweetener, which caramelises when you vape and forms a sticky residue that adheres to your coils. Also known as coil gunk, this residue will eventually burn, impacting the taste of your e-liquids. It will then render your coils useless.
Any flavour profile could contain sucralose including fruit and drinks blends. But the most likely flavours to feature sweetener are dessert, bakery and candy e-liquids.
Low resistance coils heat to high temperatures and so vaporise a significant volume of e-liquid every time you take a puff. For this reason, sub ohm coils can clog up with gunk in a matter of hours.

How to Clean Coils By Soaking
- Allow your coil to soak in ethanol, vinegar, or vodka for a few hours.
- Agitate the coil occasionally.
- Place the coil under running water to rinse it.
- Rinse the coil again using distilled water.
- Blow air onto the open side of the coil to force water to the wicking holes.
- Set the coil aside and allow all moisture to evaporate.
To make life easier and to reduce your costs, it is worth waiting until you have several coils that require cleaning before proceeding. You will then use less vodka or ethanol over time.

Ultrasonic Cleaning
Agitation enhances the cleaning process. That’s why washing machines can clean clothes so well. You could create a similar effect by using an ultrasonic jewellery cleaner. This type of device produces gentle but constant vibration that’s extremely effective at dissolving coil gunk using nothing more than water. Simply drop your coil in the water and let the machine do the work!
Some vapers report that an ultrasonic cleaner can clean coils so thoroughly that it’s almost impossible to distinguish them from new vape coils.
Is it worth cleaning your coils?
Cleaning your coils will take time and you will need to invest in ethanol or vodka. If you work your way through coils at an alarming rate, it may well be worth cleaning them. But if you use MTL coils and vape at
a low wattage, each coil could last you for a couple of weeks. In this case, it probably isn’t worth making the effort to clean them as your expenditure on coils will be limited anyway.
Don’t forget to prime your coils before reusing them if you do decide to clean them!
If you don't fancy cleaning your coils but would like them to last for longer, our guide to lenghtening the lifepsan of coils should help.